Moodle Makeover - Part 2
In case you missed my previous article, you can read it here: Giving Moodle a Makeover Part 1. This article will build on the previous one and explain how to incorporate the standard Moodle activities into a Storyline presentation (we make use of Storyline, but these principles can apply to any authoring tool), thereby having complete control over your course navigation design. We also make use of multiple presentations due to the size of our courses, and I will therefore incorporate how to launch multiple sub-presentations from the main menu presentation.
What’s important to note here is that this process works almost in the exact opposite way as that of a CD process.
A CD process relies on the presentations each launching in its own window, but in this scenario, if the SCORM package is set to open in a new window, it opens the Moodle web page again with every presentation that launches (i.e. 2 windows open when launching a presentation, not just the window for the presentation itself). The only way to bypass this is to have the SCORM package launch in the current window.
For this to work, there are a few things you will have to do in Storyline as well as in Moodle.
Here are the major steps on how to do this:
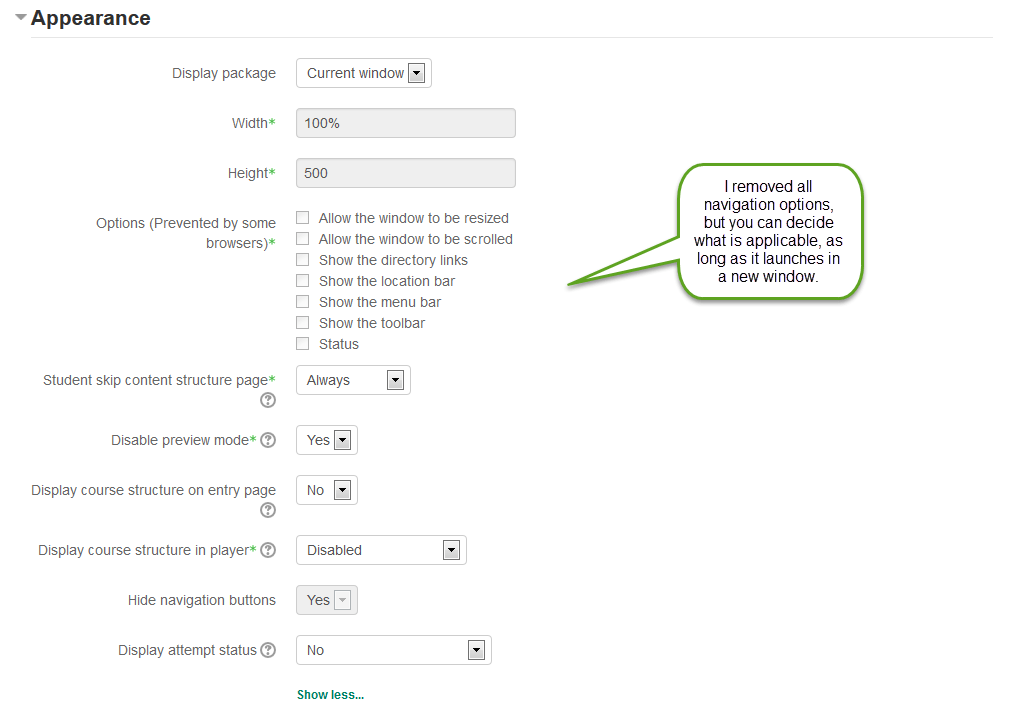
1. Publish the sub-presentations for LMS and load the SCORM packages onto the site with the following Appearance settings:
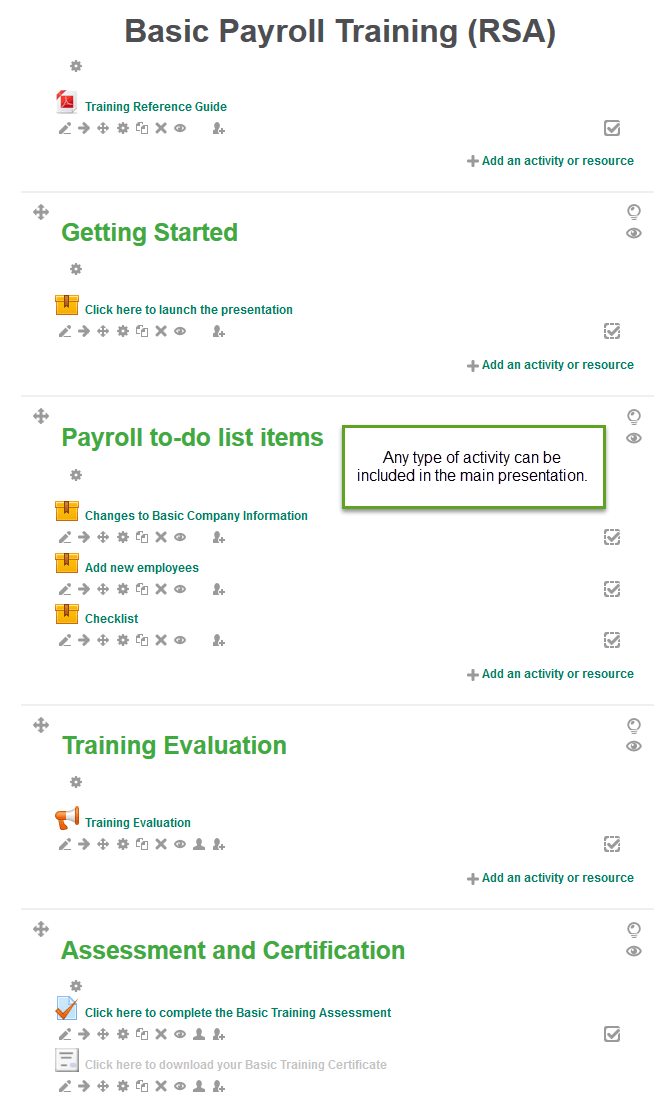
2. Create your course structure in Moodle with all the applicable activities like SCORM packages, a survey, quiz, etc..
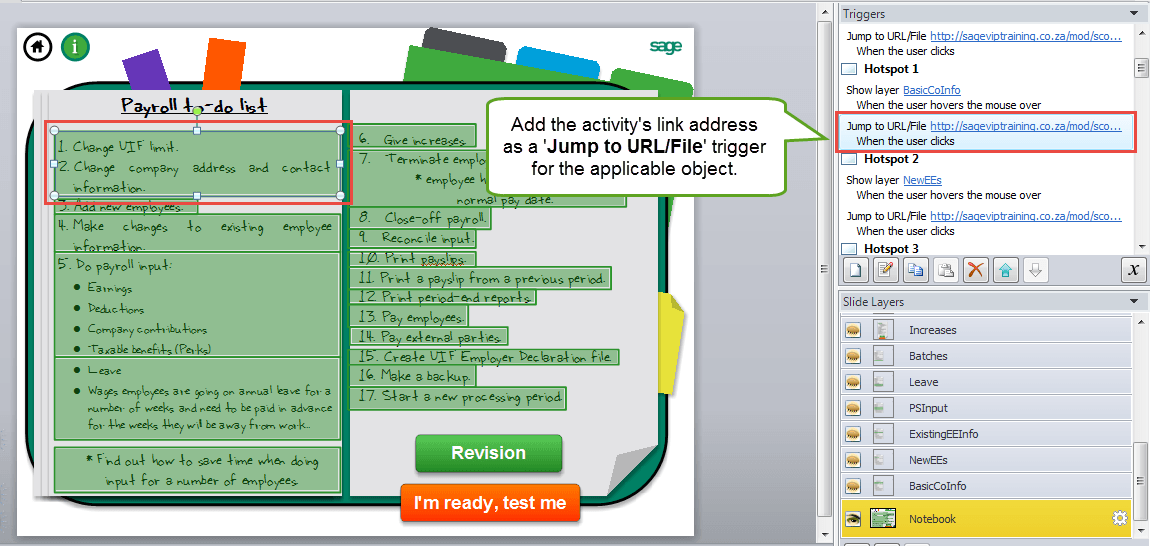
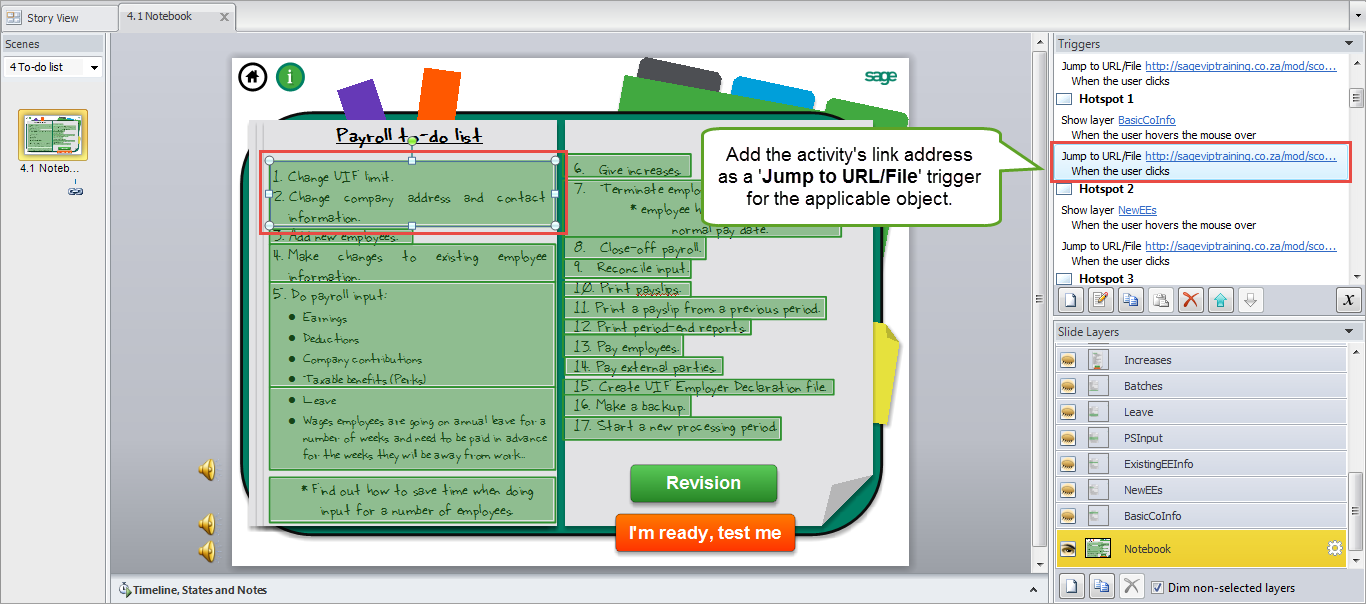
3. Create a main menu presentation with objects that will open the sub-presentations and activities, e.g. buttons, shapes, hot spots over text, etc.
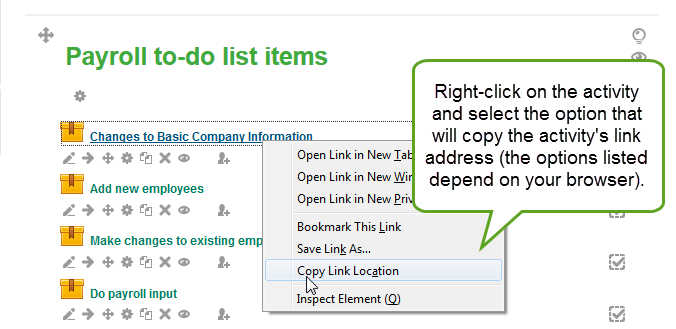
5. For the ‘Jump to URL/File’ trigger, you want the activities (SCORM packages, survey, quiz, etc.) to launch, so you must copy the link to the activity that was created when it was uploaded or added to Moodle, and paste it as the ‘Jump to URL/File’ trigger in Storyline.
Moodle:
Storyline:
6. Publish the main menu presentation for LMS and load the SCORM package with the same Appearance settings as given for the sub-presentations.
7. In Moodle: Turn editing on and click on an activity to launch it. When it launches in the current window it is a bit smaller, therefore you want to remove any unnecessary navigation and blocks from it, please refer to Part 1 for these instructions.
Do this for all the activities in your course. Remember, the clients will not navigate behind the scenes at all, so they should be able to access all the activities via your presentation/s.
8. Test each and every link in the main menu presentation to ensure that the correct activity launches and that the Window display is optimum.
9. Link the main menu presentation's activity link address to the applicable navigation option (in our case the applicable book on the bookcase) on the Moodle front page.
10. Be sure to give proper instructions, as the main menu presentation will remain open while all the activities will launch in a new window. Therefore, upon completion of an activity, you return to the main menu presentation by closing any new windows that open.
And that’s how you can give Moodle an e-asy makeover!
I trust this article is helpful and that it inspires even greater accompl-e-shments!
