
How To Create A Video Like A True Professional
Simply put, video production is when you begin to create the assets to bring your script to life. Depending on your creative brief/learning strategy, production may include raw video, photographs, voice-over narration, music, and 2D and 3D animation.
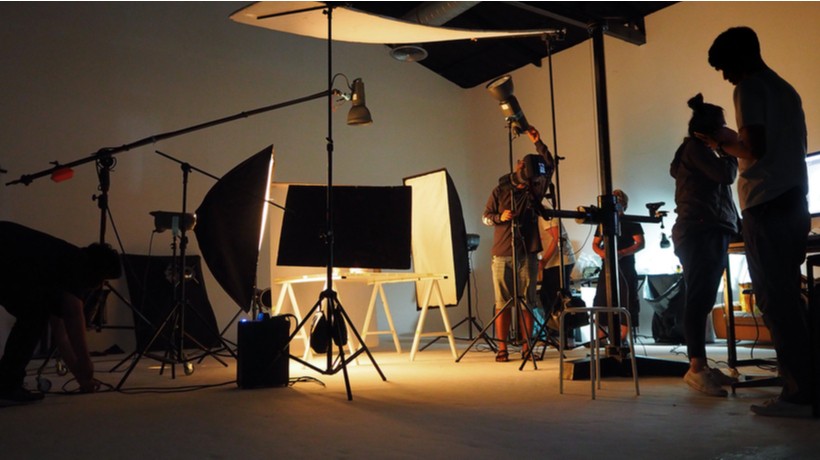
The following are a few pro-tips to get you ready for a great video shoot:
- Respect the location
First and above all else, kindness goes a long way in a professional setting. Always ask for permission and be apologetic if you interfere with someone’s workday. Take special care of exits and your surroundings. Avoid blocking main walkways or creating tripping hazards with your gear. Leave no trace! Clean up after you finish your shoot day… as if you were never there. - Have makeup ready
Always have a makeup kit packed with powder, cover-up, comb/brush, hairspray, scissors, and nail clippers. High definition video highlights the tiniest of imperfections. Be ready for a quick fix by having a few beauty and grooming items on hand. - Props and wardrobe ready
Waiting for props can be a frustrating and time-consuming effort on your shoot day. Therefore, organize props for your shoot prior to the shoot day. If someone else is responsible for props, contact them ahead of time and make sure they are ready. Finally, if you’ve asked talent to bring a specific wardrobe, make sure they bring a few alternate options and that they are wrinkle-free. - Collaborate with your videographer
Talk with your videographer early and often to make sure you both share the same vision of each shot. The videographer or DP (director of photography) is typically the person operating the main camera on a shoot. This person is responsible for making decisions about the positioning of your subject, the lighting of each scene, camera angles, and any camera movement.
Video Recording
After you have everything ready and organized, it’s time to start recording video! Let’s start with shooting your raw footage.
Make Your Shots Professional
Your video’s professional appearance is highly dependent on how well each scene is lit. Pay close attention to how the lighting creates shadows and how it highlights your subject’s on-camera appearance. The shadows should have soft edges and the light should not be too bright (hot) on the subject. Lighting is one of the most important video production values that separates an amateur video from a professional video.
The most common lighting technique is 3-point lighting and it includes a key light, fill light, and back light. The key light is generally your brightest light and is placed on the left side of the subject. A fill light is added to the left side of the subject to balance the key light. Finally, the back light is used to highlight the hair and separate the subject from the backdrop.
Make Your Audio Professional
Always monitor the audio you are recording. Designate a person to listen with a pair of headphones to make sure the quality is consistent and that the mic is not picking up unwanted sounds. In a training video, good audio is just as important as the lighting.
I recommend using a shotgun microphone that plugs directly into your professional camera with an XLR cable. You can also use a field recorder if you cannot plug directly into your camera. Another option to capture audio is with a lavalier microphone that clips to the talent’s clothing. I recommend this option if the environment is noisy. However, be mindful that a lavalier may pick up the rustling of clothing.
Pay close attention to where you put the microphone. You want to make sure that you pick up the audio at an appropriate level. For example, a shotgun mic must be pointed right at the mouth of the person you are recording.
As you monitor the audio, pay attention to the levels. Audio that is recorded too low sounds fuzzy or crackly if it is made louder in post-production editing. Conversely, audio that is recorded too loud may sound exceptionally distorted.
Make Sure The Red Light Is On
Sounds silly, right? However, even the best trained professionals sometimes forget to press record on the camera. And, you know Murphy’s Law will make sure that when you forget to press record, you’ll miss the best take of the day! To avoid this tragedy, the DP and the director should verify that the camera is recording. The DP should confirm that the timecode is counting up and the red light is on. He will then say “Speed,” which indicates that the camera is recording. The director should check the video monitor to make sure the timecode is counting up and that the red circle appears on the monitor. When the director is ready, he can finally say, “Action!”
Make Changes During The Shoot
A great way to make your editor’s time more efficient is to actively mark up the script and shot list as the shoot day progresses. If the copy changes during video production, write it down and cross out the old copy. If there are multiple takes, make a note of which one is the best.
If possible, try to denote the timecode where the talent said the line perfectly. Along with marking up the script, check off each shot on the shot list so that you don’t forget anything. Finally, give a copy of your marked-up script to the editor along with the video files.
Watch The Action
Are you starting to appreciate why you should have a production team? It’s a lot to balance—marking up the script, listening to audio quality, checking lighting. And we aren’t done yet!
You also need to watch the composition. When you’re watching the action, make sure the videographer has good picture composition. Fortunately, there is an easy rule to help with good composition to get you started: the “Rule of Thirds.”
The “Rule of Thirds” states that a photographer or videographer should line up the screen like a tic-tac-toe board dividing it into 9 equal quadrants that obviously have 4 intersecting lines. The focus of your content should be at those “points of interest” or intersections. This demonstrates great composition and makes your shot aesthetically pleasing to the viewer whether it’s a wide, medium, or close-up shot. It’s also important to note that while the “Rule of Thirds” is stated as a “rule,” it is not an “end all, be all” solution.
However, it is a strong starting point.
Back Up Your Files
Technology can fail, and human error often prevails. The last thing you want is to find out all of your hard work mysteriously vanished from the hard drive. After you capture your video, back up your files to at least two locations before you go home for the night. A portable, external hard drive and a storage server are two great options.
Make sure the editor is ready to import the files to the editing computer as soon as possible to reduce the opportunity for lost or deleted files by team members cleaning up hard drives for more space.
You may be thinking that two or more locations is overkill. Remember that video files are computer data, and technology does fail. I’ve had portable hard drives and local hard drives fail. My server has even failed. However, I've never had more than one fail during a single project. Knock on wood.
Voice-Over Narration
We’re not quite done yet with production. You have the video, but now you need the voice-over narration. You will want to begin recording your voice-over after the video recording is complete to be most efficient.
Remember the marked-up script you edited on the day of the shoot? You will be thankful to have it now. Often, when you write the script you have great ideas, but on the day of the shoot those great ideas don’t pan out the way you envisioned. Because you decided to change the shot, the voice-over may change as well. By marking up the script you save a lot of time because you don’t have to review the footage to see exactly how the script has changed. Also, this is why it’s important to wait until after you shoot to record the voice-over.
Make sure that you attend the voice-over recording along with an SME and/or a stakeholder. Attendance may be in person or virtual. This is your last opportunity to make any changes to the script.
During the record, make sure everyone has the most recent copy of the marked-up script. Make sure you are prepared to update the script, just as you did during the video shoot. Again, this provides the editor with a more efficient path to editing the video based on all of the final assets you’ve created.
Ask the voice-over talent to read each Index number in the script prior to recording. This provides the opportunity to do multiple "takes" of each scene and helps the video editor by providing options. Editors love options!
Pan Out And See The Bigger Picture
If you would like to learn more about the other phases of video production, you should download the eBook The Beginner’s Guide To Making A Training Video. In this eBook, I draw on my decades of training video production experience to break down the process and remove the curtain of mystery. I will provide you with the knowledge and tools to plan, write, and produce a professional and effective training video.