

Adding And Uploading Moodle User Accounts In Your Moodle Course
You have already installed Moodle on your Mac or PC (Windows) and now it’s time to set up your Moodle user accounts. Let’s begin!
The Complete User Guide To Moodle Chapter 2
Step 1
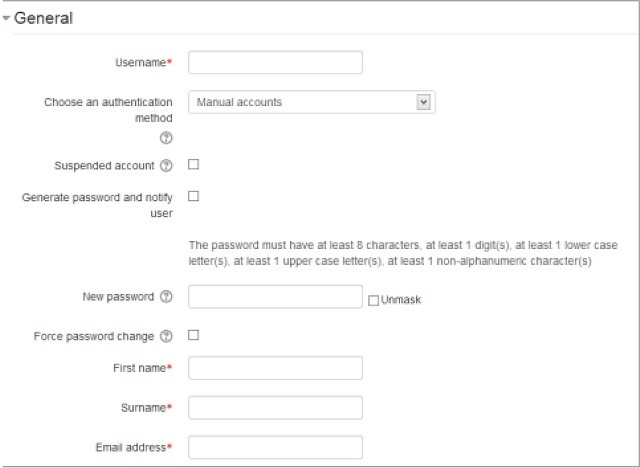
The first step is to assign usernames and a temporary passwords (this can be changed at any time). Usernames can only consist of lowercase alphabetical letters, numbers, hyphens, underscores, periods, and “at” characters (@). If you want to increase username capabilities, simply enable the Moodle administrator setting “Allow extended characters in usernames.”
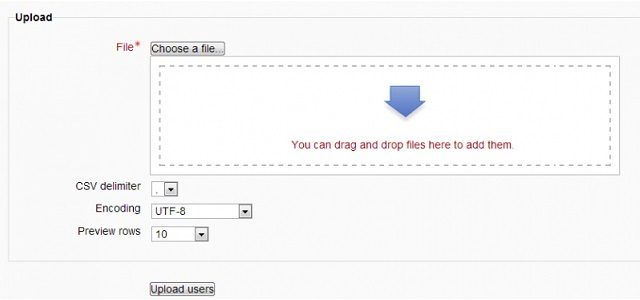
Navigate to this option in the site administration settings: Users > Accounts > Add a new user. If you want to upload multiple users at a single time use the path: Users > Accounts > Upload Users and upload your text file.
Credit: Lambda Solutions
Step 2
Next, you will need to define authentication methods. This security measure is the process users go through when Moodle is verifying the user’s specified password. If user accounts are created by a Moodle administrator, the “Manual Accounts” method will be used. If users created their own accounts (using the email sign up method), the email based self-registration method will be used.
Step 3
A temporary password will be automatically generated by Moodle for each user. A follow up email will then be sent to users, with instructions on how to login to their Moodle account and change the temporary password they’ve been assigned. (To change a password, you go to User menu > Preferences).
Moodle User Account Information To Consider
Input users first name, last name, and email address. The first and last name will be displayed whenever the user writes in forums, and when the user is included in lists or reports. Moodle users can also update their city/town, country, timezone, and preferred language. The email address provided is where users will receive any notifications, such as password reset notices, message notifications, or forum digests.
Email Management Settings
There are a couple of different email management settings to go over for security. First, there is an Email Display setting which controls who can see each user’s email address. Second, there is an Email Format setting which ensures Moodle sends text only emails to the specified user. Third, is an Email Digest Type setting which will control the type and frequency of emails that are sent to the user. You have the option to select which forums you want users to be subscribed to and how frequently these updates come:
- No digest wherein one receive updates every time there is a new post
- Complete wherein the user receives a single daily digest
- Subjects wherein the user receives as single daily digest with only the post topics included
User Profile
Users have the option to include a personal description and upload a user profile picture which will be displayed for other users in the site to see. While it is not mandatory for users to include this information, experience tells us that it can help create a more personable and friendly environment in Moodle. Users also have the option of including their interests, institution, department, phone number, address, as well as various application ID’s such as Skype, AIM, MSN, and Yahoo. Again, this information is not mandatory; but it can be provided by instructors, for example, in order to be more accessible to help learners.
Now that you know how to upload users and set up user accounts in Moodle, it’s time to begin uploading and/or creating courses in Moodle!
How To Enroll Students In A Moodle Course
Once you have created your Moodle course, the next step is to enroll your learners into that course. The following instructions are for manual Moodle enrollments:
Credit: Lambda Solutions
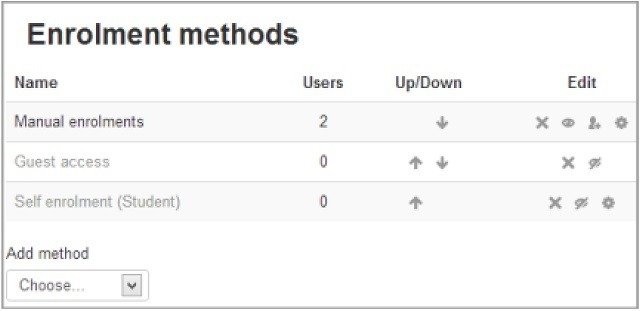
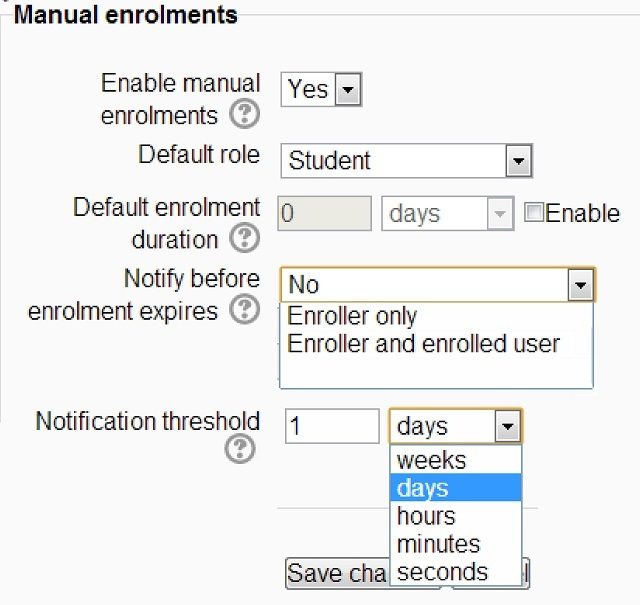
Begin in the course you wish to enroll students in and navigate to Administration > Course Administration > Users > Enrollment methods, and make sure that “Manual Enrollments” is enabled. If it is enabled, there will be an icon of an open eye; if not, enable it so you can manually add students into your Moodle course. Within this screen you also have the option to edit the manual enrollment settings so that certain actions occur automatically. These settings include the default role of the enrolled user, the person(s) to notify when the course is about to expire, and the length of time that the Moodle user will be enrolled in the course for. Once this is set, you have one of two methods for enrolling users.
Credit: Lambda Solutions
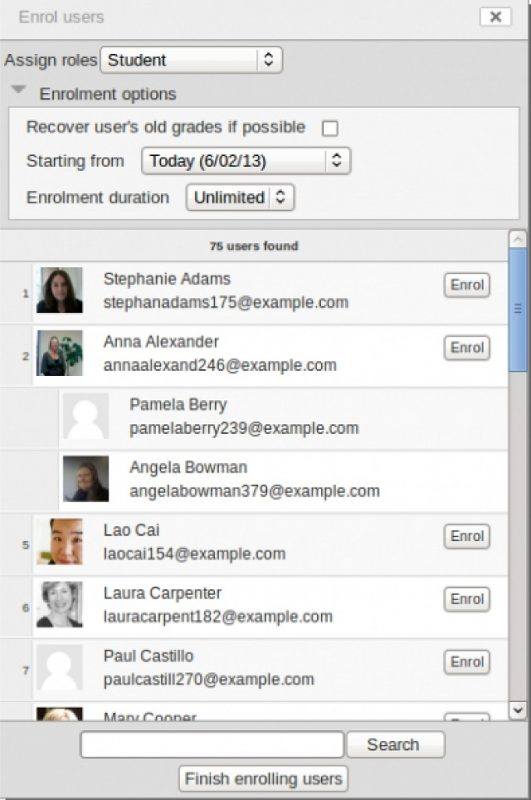
Method #1 (Single Select)
- Go to Administration > Course administration > Users > Enrolled users, and click the button that says “Enroll users” (it should be located either at the top right, or bottom left)
- If you want to change the role of the users you are enrolling, use the “Assign roles” dropdown to select a different one
- Select your desired enrollment options
- Search for the user, and click the “Enroll” button opposite their name. The user’s name in the list will indent. You will know a user has been successfully enrolled when users name in the list is indented, and the enroll button disappears
- Finally, you can either click the button that says “Finish enrolling users”, or just close the “enroll users” box
- The users should now appear in the list of enrolled users.
Credit: Lambda Solutions
Method #2 (Multiple Select)
- Under Administration > course administration > users > enrollment methods, click the icon that says “enroll users”, in the editing column opposite where it says “manual enrollment”
- From the list of users are not enrolled, select the users you wish (Shortcut: use Ctrl + click to select multiple users)
- Add” these selected users to the enrolled users list and then click ‘save as’
If you want to learn more about a successful Moodle LMS installation, download the eBook The Complete User Guide To Moodle Chapter 2.