

User Management: Manage Your Users With eFrontPro
From blended learning and eCommerce to integration with third party software, we have covered a lot of eFrontPro’s Learning and Talent Development related features in our previous posts. This time, however, we will examine a rather more basic functionality of the software, that is nonetheless essential for running any kind of training and talent development program. I’m talking, of course, about eFrontPro’s user management features.
Of which there are a lot - and yet, they still manage to remain both flexible and intuitive.
So, let’s dive right in...
User Management In eFrontPro
User Management in eFrontPro, as is the case with most system management tasks (especially those related to security), is the realm of the administrators.
In order to manage users, and generally put into practice anything that you’ll learn from this post, you’ll need to be logged into eFrontPro’s eLearning portal as one, and be looking at your administrative Dashboard.
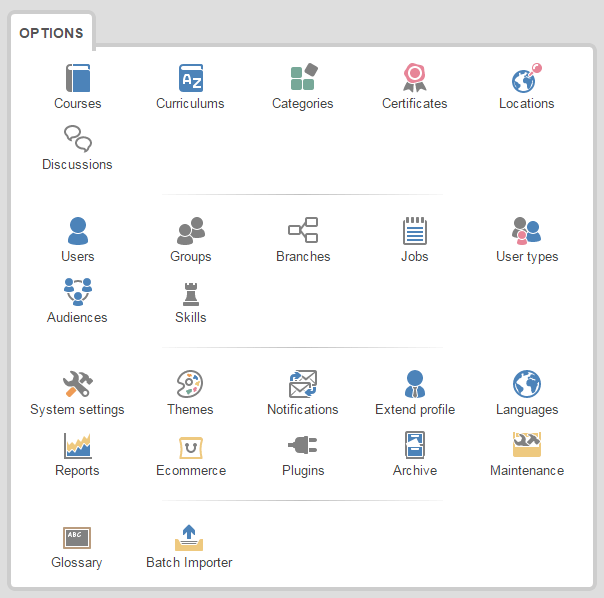
The user-related UI pages linked from the Dashboard are:
- Users: Add/edit/delete and manage users.
- User Types: Fine-tune what users can do on the platform.
- Extend Profile: Store custom information about your users.
- Groups: Create virtual groupings of users.
- Audiences: Similar to Groups, but to be used in eCommerce and course management.
- Reports: Get reports on user activities.
There are other administrative pages tangentially related to user management which we will cover later on, but for now the above will do.
Let’s begin by examining what each of these pages does.
Users
The Users page lists all users along with some basic information about them (user type, status, last login date, etc). Each row of user information features buttons that allow you to view or edit the details for that specific user, or delete the user altogether.
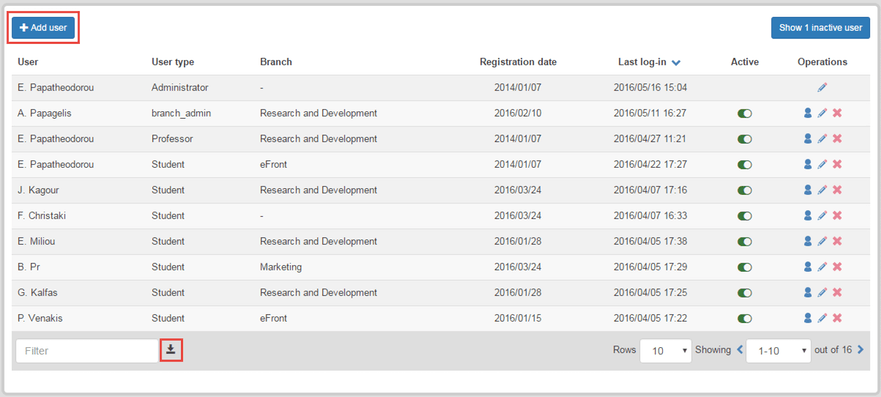
Apart from that, the Users page is quite spartan (or, if you prefer, simple), as in that its only other major UI element is an "Add user" button, plus a button for downloading the full user list as an Excel-compatible CSV file.
That’s not because eFrontPro lacks user management power -far from it- it’s just that most of the user related actions happen in the Add/Edit user sub-page, or in other administrative sections.
Add/Edit User
Whether you click to edit an existing user or click to add a new one, you get basically the same User Management details form, the main difference being that for an existing user their information will already be filled in.
The necessary fields are mostly what you expect: First and Last name, username, password and password confirmation, and email address, plus the User Type, which defines what permissions the user will have on your learning portal.
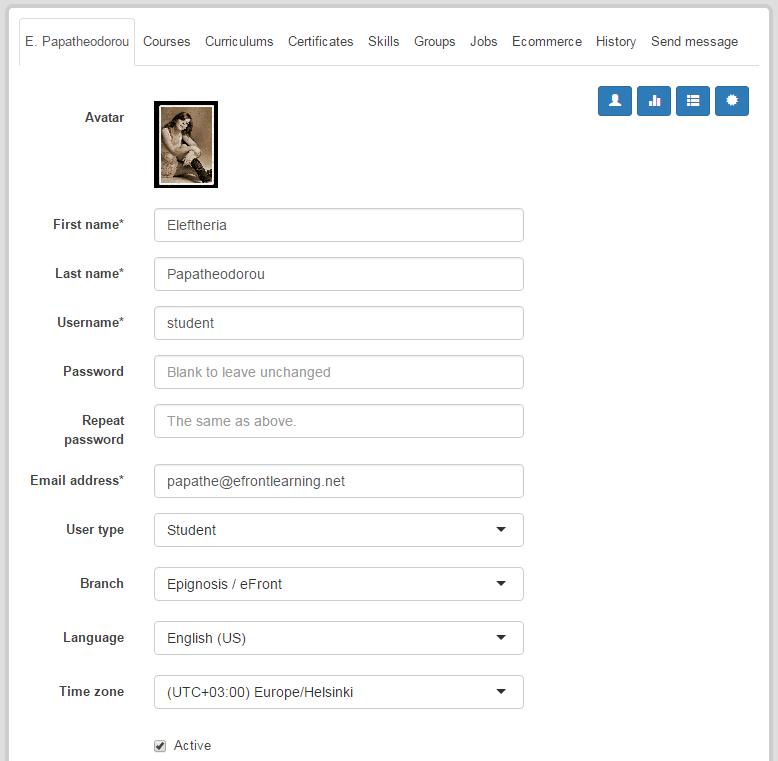
The latter will default to Student (since most of your users will be learners), but you can opt to create a new Administrator, Instructor or any custom User Type you might have.
User Types
As we’ve already mentioned, a user’s type defines what the user can do in eFrontPro. This is similar to what other systems call a "role" - although eFrontPro simplifies this, as users can only belong to a single type.
That said, all users in eFrontPro must belong to a type, and this type can be either one of the three built-in ones (Administrator, Professor Student) or a custom User Type, which we will see how to define later on.
You create and manage your user types from the "User Types" page, where you can also see a listing of all existing user types in your eFrontPro installation.
New eFrontPro installs come with the three default user types: Administrator, Instructor, and Student. You have the option to fine-tune the permissions of the built-in types or to create new user types that extend an existing type and customize its permissions.
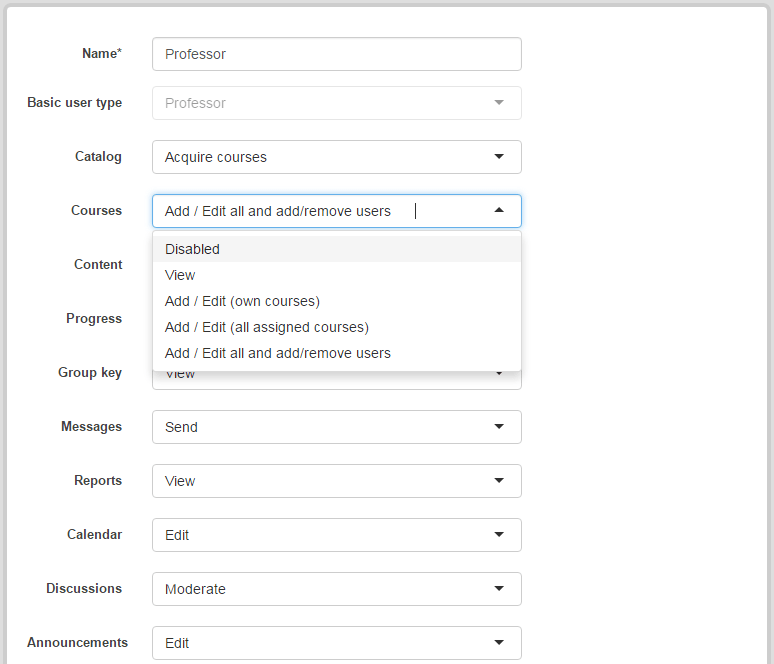
Permissions are applied to the platform’s entities such as courses, lessons, users, groups, jobs, branches, etc., and the basic ones you should be familiar with are: “Disabled” (not applicable to this user), “View” (user can view this kind of entity) and “Edit” (user can view and edit this entity’s properties).
Some entities can also have one or more additional permission levels that are beyond the scope of this post, but whose meaning should be immediately intuitive.
By creating a new user type and setting the appropriate permissions for it, you get a lot of flexibility to allow or restrict access to eFrontPro’s functionality. You could for example create a "Content Manager" User Type that can upload and edit lesson content, but cannot create new courses or access user management features.
For the most common business use cases, even just the three built-in user types can go a long way - each representing a intuitive and recognizable role that’s quite familiar from the traditional education environments; "Administrators" corresponding to a school’s administrative offices, "Instructors" being the teachers, and "Students" being the learners.
Extend Profile
While User Types are helpful for managing user access to eFrontPro’s functionality, "Extended Profiles" are all about customizing what the system knows about any particular user.
As such, they serve as a way to extend (so, aptly named) the basic user data eFrontPro keeps, like "Name" and "Email", with basically, whatever you’d care to have.
You’re not confined just to text either, as an extended field can be of any one of several types, including a free form text entry, binary choices (e.g. yes/no) and dropdown selections among multiple options.
As usual, the "Extend Profile" page starts with listing existing extended profile fields (if any), letting you edit or delete them, or add a new one.
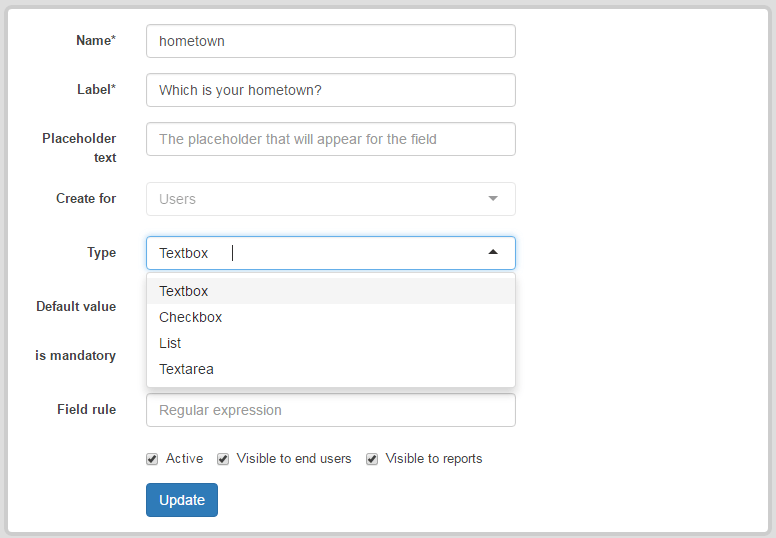
To create your own Extended Profile field, just click "Add Field" and enter a name (how the field will be known to the system), label (how the field will be shown to your users), placeholder text (to inform the user what the field is about, e.g. “Insert your LinkedIn account name here”), default value (used when the user doesn’t specify a value of their own), whether the field is mandatory or optional, and, last but not least, a field (validation) rule, that is, a regular expression (a kind of computer instruction) used to determine whether the value was entered correctly.
Finally, there’s a toggle to activate the field, and another to make it visible or invisible to end users (this helps keep a field only visible to system users).
To Be Continued...
And that pretty much sums up part one of our User Management in eFrontPro article- which is all you need to know to hit the ground running.
In the follow-up article to this, we’ll be covering some more User Management features, including Groups, Audiences and User Reports, so stay tuned!