
How Storyboarding Will Help You Get Professional In Course Authoring
No two storyboards are quite alike. Some prefer to draw pencil sketches on paper, so that it’s easy to add new pages to the course skeleton and make fast edits to previously created thumbnails. Others find using a Word numbered list or an Excel spreadsheet more convenient. Then again, I’ve met people who swear by their richly visualized storyboards created in PowerPoint, complete with page mockups and detailed descriptions of every element. In the end, you can use whatever tool best suits your needs and preferences. There are many sites on the internet that allow for the creation of mockups and visual maps, and you can use any of them to create your storyboards.
7 Tip To Get Started With Storyboarding
- Pick the tool you will be using for creating storyboards. You can choose one of the tools mentioned earlier in the article, or pick something else entirely - up to you!
- Create a sketch of the title page with the name of the course and 3-5 page mockups containing the course sets out to accomplish, e.g.
- What Ιs Gamification?
- Game Thinking.
- Game Elements.
- Motivation & Psychology.
- Gamification Design Framework.
- After you have outlined the principal structure of the course, it’s time to go deeper and describe the structure of every section of the course. The most logical way to go about it is to make sure that every page deals with an individual concept. Consequently, there should be no more than a single idea per storyboard screen.
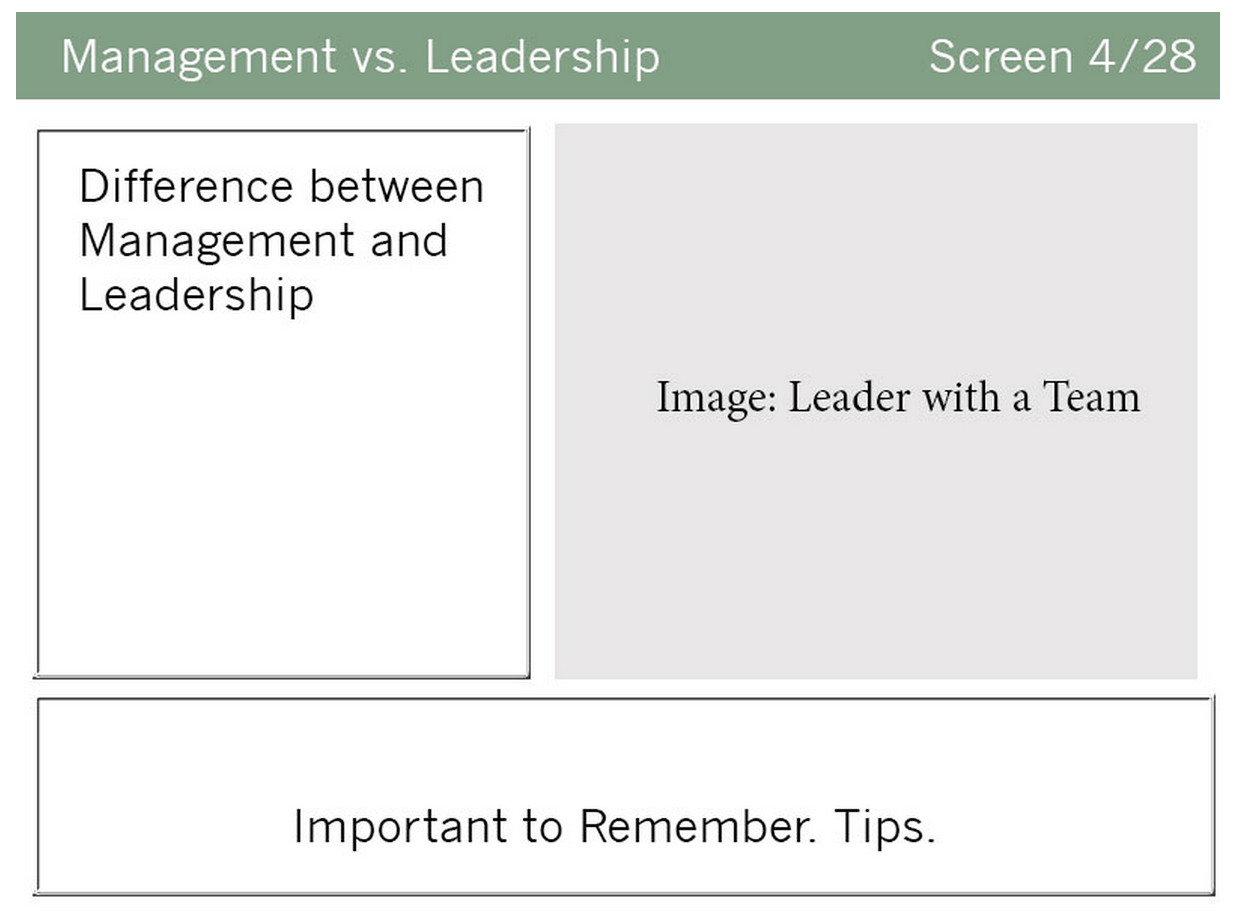
- Try to visualize the general layout of every page. You don’t have to be able to draw well to do it - just add some squares and circles in place of illustrations. If you are feeling adventurous, you can fill those with simple shapes and stick figures. Here is an example:
- Enumerate all screens in the storyboard, e.g. 1/16, 2/16, 3/16, and so on.
- 6. Lay out the screens of your storyboard in order and try following the story they tell. Look at them through your learners’ eyes. Is all information delivered in a logical order? Did you leave out something important? Are your notes clear enough so that you will be able to build a complete course using your storyboard for reference a week later? Have you touched upon all important areas?
- If you need to present your storyboard to your client or boss for review, it pays to show it to a good friend first and ask for feedback. Ask them to read your storyboard and then retell what they took away from it in their own words. If what you hear differs significantly from what you tried to express, you should consider revising your storyboard or even starting from scratch one more time. Ask your friend for advice, ask them how they would have handled this or that part differently from you, and use whatever good ideas they come up with.
Using Authoring Tools For Storyboard Creation
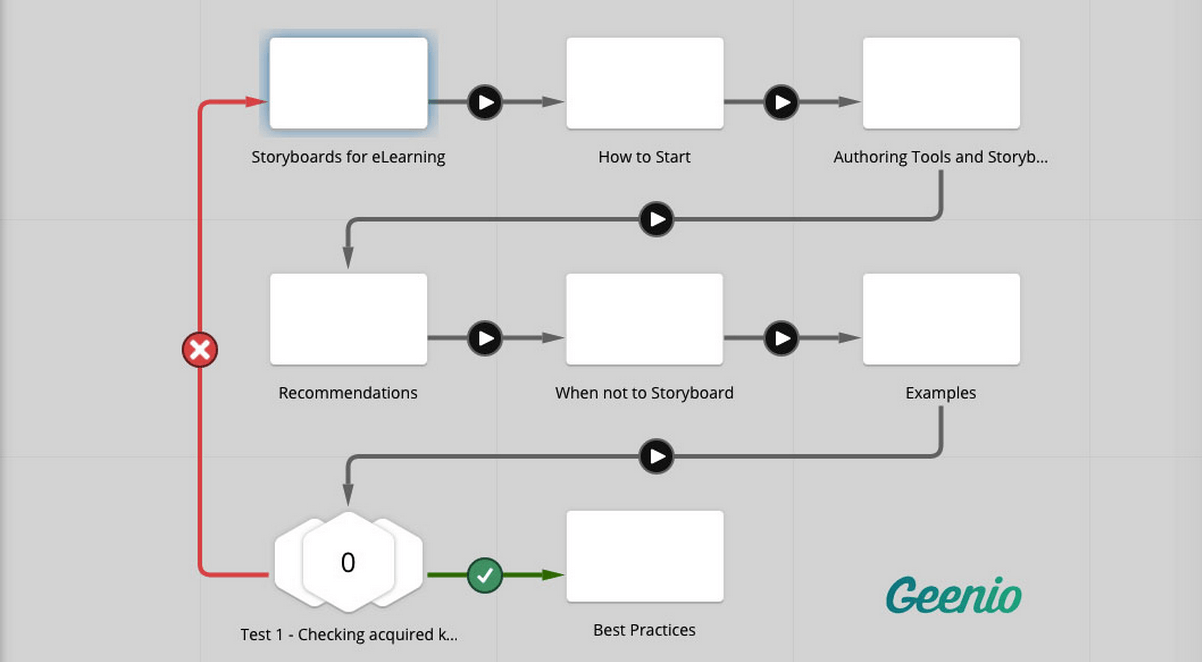
If you do not feel like spending time looking for the perfect tool to build your storyboards, you’ll be happy to hear that a number of course building solutions come with storyboard building tools built in. They usually take the form of a special mode allowing you to take a bird’s eye view of your course’s structure. For example, in Geenio this mode is called the Pathboard, and entering it allows you to see the structure of your whole course, the sequence in which pages and tests are presented, as well as the connections between them. Some course editors not only provide you an overview of your course’s structure, but enable you to edit the course’s structure and add additional elements to it as well.
Having such an authoring tool at your disposal does not mean that you have to begin working on every course you create by meticulously constructing every page. Start by creating the course’s skeleton in the Pathboard mode - lay out the pages for the main topics the course will cover, determine the best places to place tests, and so on. Use the steps in the "Getting started with storyboarding" section for reference.
Creating storyboards directly in a course builder has the advantage of the storyboard gradually turning into the course itself. In fact, what you are creating is not so much a scheme as a foundation. Thus, you will not have to recreate your page mockups in the authoring tool, as you will have created them in the course builder from the start.
In the second part of the article we will discuss the situations where using storyboards is not optimal, as well as take a look at best practices for storyboard creation. See you soon, and in the meantime - go make some storyboards!