


Instructional Video Development Process: Stages And A Case Study
Because video includes sound, visual imagery, and motion, it lends itself well to demonstration (not just description) of conceptual information. Music and visual imagery can also capture the human, emotional element of learning, building trust and fostering collaboration.
Transforming Learning: Video For Cognitive, Emotional, And Social Engagement
When designed correctly (taking advantage of dual coding and not overloading the learner’s cognitive ability), videos can be effective tools for presenting microlearning, performance support, and just-in-time learning. Learners spend less energy consuming video, affording them a “big picture” perspective on the topic. By using both visual and auditory channels in manageable chunks, a video can be an effective tool for rapid assimilation of information. The richest learning addresses the learner’s cognitive, emotional, and social needs (Illeris, 2009, 2015), and video is well suited for engaging the “whole learner.”
If you’ve read our previous articles on effective instructional video development, you probably know by now some best practices for creating videos for training as well as described software tools for video production. In this article, we’ll explore Obsidian Learning’s video development process and then we’ll take a look at the production process of a video titled “Learning is Life”.
Let’s begin.
5 Stages Of Obsidian’s Video Project Development Process
Here is a brief overview of our process for creating videos.
1. Information Gathering
As with any learning development project, we start by gathering information from the client and Subject Matter Experts about the topic.
These meetings typically involve Obsidian project managers and a learning strategist, along with client stakeholders. Information gathering also includes discussion of possible treatments, presentation styles (for example, whether it will be formal or informal), and required visual elements (such as organizational branding). We also obtain any available client content, such as written procedures or graphics.
Clients will often have very specific opinions on stylistic decisions, sometimes based on existing work. While we try to respect our clients’ vision, we also encourage creative input from our design team. Ideally (from a designer’s stance), the designer should feel empowered to visualize the content in a fresh way.
This freedom ultimately evokes a more passionate/engaged workflow and can produce striking results. In addition, experimentation results in an expanded toolkit for animators to draw from for future animation projects.
2. Instructional Design
After this initial analysis, the next step is for the learning strategist to create a design document. In the case of videos, the learning strategist starts by writing a script for the video. The script is similar to what might be written for a play, and it contains not only the narration but also “stage directions” indicating suggested characters, scenes, actions, and other visual elements. The script is then submitted for client review and approval.
3. Storyboarding
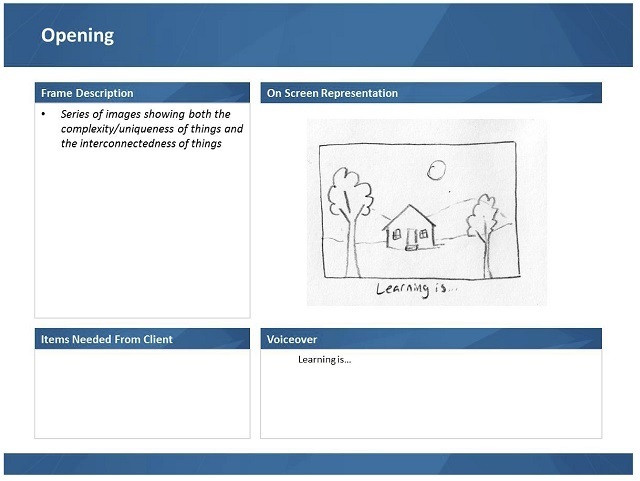
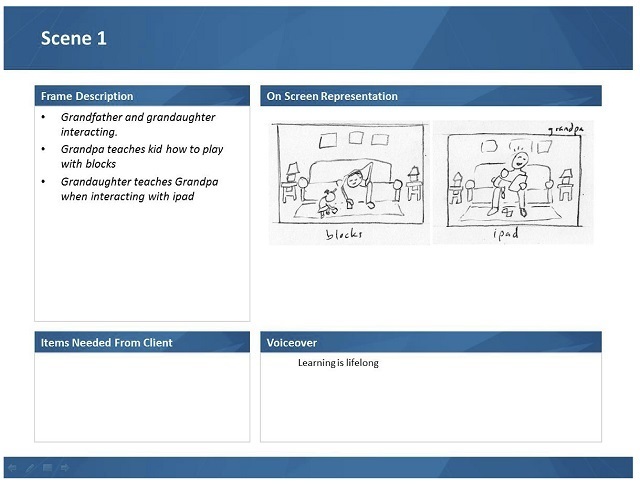
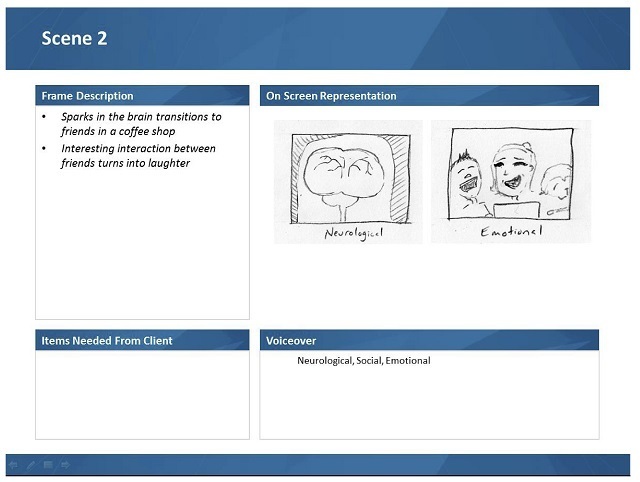
Once the script is approved, the learning strategist then develops a storyboard – just as with any eLearning piece. At this point, the visual designer is more fully engaged for input on such elements as imagery and visual style. The strategist fleshes out the “stage directions” by grouping relevant content into various scenes. For each scene, the visual designer makes a drawing to depict what occurs in the scene. We use a PowerPoint template for video storyboarding:
Credit: Obsidian Learning
The Frame Description box describes the characters and images that will appear, as well as the actions that will occur. The On Screen Representation box contains the initial drawing developed by the designer. The Voiceover box contains the spoken narration of the piece. Anything that the client needs to provide (for example, a company logo or clarification of information) goes into the Items Needed From Client box. We develop a slide for each scene of the video:
Credit: Obsidian Learning
Credit: Obsidian Learning
4. Visual Design
Upon client approval of the draft storyboard, the designer/animator will read the script and plan the onscreen visuals. There are several critical elements to consider during this phase that lend to smooth development:
- Think about the graphics that will need to be created and how these graphics will interact with one another.
- Once in a visual format, make sure that the progression or sequences make sense.
- Frame each scene so that pertinent information is clearly illustrated and does not get lost among other on-screen elements.
5. First Draft Animation
Based on the approved script, we then record placeholder voiceover (VO). The placeholder VO becomes the timing backbone upon which we build the first draft or animatic. Once the timing of the entire piece is established, any gaps or lulls in onscreen visuals become clear, and we can make changes to tighten the timing. At this stage, clients are given an opportunity to provide input regarding how effectively the piece communicates their vision.
Following client review, we make any necessary script alterations and record professional VO. The animator then refines the animation and syncs the VO. Depending on the scope of the video, sound effects and cinematic background music might be added before sending the finished product for review. Clients will then provide any final input and edits can be made to conclude production.
Case Study: Learning Is Life
In late 2016, we produced a video titled “Learning is Life” to support a presentation at the Corporate Learning Week conference sponsored by the Corporate Learning Network [1].
We segmented the video so that the presenter could proceed at a comfortable speaking pace, and as if each section were a new slide in a presentation. Following the conference, we reformatted the piece as a single video. This case study covers the process we employed to move from a concept to a finished, cohesive video.
Requirements
The conference focus was the rapid rate at which the learning industry has been changing. There are many mixed opinions about how technology is affecting the industry landscape and how professionals should react to such changes.
At Obsidian we passionately believe that we, as an industry, need not focus on learning technologies but rather on the fundamental practices that create effective learning. While we love technology, and we use it every day, we understand that technology is there only to support the design. Design, not technology, is what matters.
Script Development
After the team decided on a theme for the video, our very talented copywriter developed the script. It read much like a poem, and was intended to evoke an emotional reaction in the audience. The piece is broken into 4 sections:
- The first section is meant to set the tone and grab the attention of the audience.
- The second section covers the grim reality of many learning environments.
- The third section transitions to a more optimistic view and introduces the Obsidian Learning concept of “blended learning” (Victor, 2016).
- The final section is meant to leave the audience with a renewed and invigorated outlook on the future of learning design.
Storyboarding
With the tone established and the script written, we began storyboarding the video. To establish cohesion throughout the first section, a main character is followed from scene to scene as her journey through life teaches her subtle lessons. Each line of text was associated with a unique scene, building a sequence of events.
Animation Development
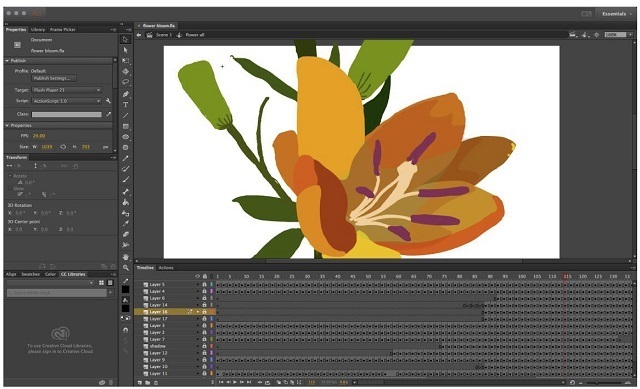
The general tone and overarching theme greatly influenced the choices made in terms of animation style. Utilizing a rough frame-by-frame animation expressed a personal, handcrafted vibe that meshed with the intimate feel of the video. This animation method can be extremely labor intensive, as keyframes are individually generated. With a frame rate of 24 fps and keyframes every other frame, that makes for a lot of drawing. The frame-by-frame animation was developed in Adobe Animate and exported out in pieces as .swf files.
Credit: Obsidian Learning
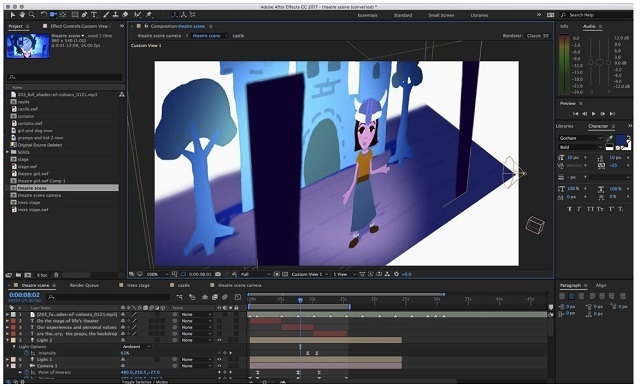
These animated assets were then imported into Adobe After Effects where all the color correction, compositing, camera work, and any additional animation was generated.
Credit: Obsidian Learning
Finding a song that worked well and created the proper atmosphere was the next challenge. Once we landed on something we could agree on, the pace of the video was timed to the music. The tempo of the song was important to consider because it was a huge determinant on how quickly the presenter would need to speak and how much time there would be for leeway.
The second section was designed to be a stark juxtaposition to the first section. Instead of comforting music, vibrant colors, and a rich animation style, we used an ominous backing track, black and white visuals, and a minimal, almost cold animation style.
The third section was designed to allow the presenter to speak at her own pace and was originally composed of static PowerPoint slides. The idea was to do exactly what the script said, that is, “Wait, let’s take a beat, take a breath, take a step back.” This section acts as a pause to help refocus the audience away from the grim reality and shift back toward an optimistic view. Here we introduce the concept of blended learning and have the opportunity to showcase a graphic representation of the learning philosophy that is one of the cornerstones of our designs.
After the presentation, we added subtle animations to the slides to facilitate the creation of one continuous video. Finally, we circled back to the poetic and inspirational feel that we started with.
The animation was roughly modeled on that of a title scene or movie introduction. As the words are meant to be the main focus, the images on screen tie together the concepts of blended learning and life-long learning.
The final piece is available here: Learning Is Life
If you want to learn more about effective instructional video design and development, download the eBook Transforming Learning: Using Video For Cognitive, Emotional, And Social Engagement.
Related articles:
1. 3 Cognitive Theories For Transforming Learning
2. Transforming Learning: Applications Of Instructional Videos
3. 6 Top Tips To Design Effective Instructional Videos
4. Software Tools For Instructional Video Design And Development
Footnote: